iPhoto University
Natural & Artificial Lighting
In my day, we had to rub two sticks together to light our photos! We didn't have fancy PDAs like you kids have. Listen up. I'm about to serve you legit lighting wisdom.
1. Lighting with the Sun

If you live anywhere on Planet Earth, the best available light is the sun. It's dependable and bright as heck.
Try lighting your subject with the sun in three ways: straight on, from an angle, and backlit.
Straight on: The sun is behind you and facing your subject, giving you an even plane of sunlight.
At an angle: The sunlight is coming from either the side or diagonally for dramatic shadows. If you want them to be softer, fill in shadows by bouncing light into them. Think reflectors, white cloth, paper, etc.
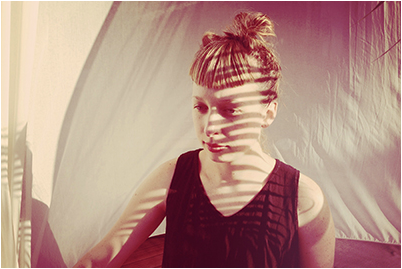
Backlit: The dreamiest one. The sun is behind your subject, facing you. You'll get a soft cast across your photo and maybe even lens flare (glowing orbs). Tap on your subject to make sure you capture all the detail.
Try lighting your subject with the sun in three ways: straight on, from an angle, and backlit.
Straight on: The sun is behind you and facing your subject, giving you an even plane of sunlight.
At an angle: The sunlight is coming from either the side or diagonally for dramatic shadows. If you want them to be softer, fill in shadows by bouncing light into them. Think reflectors, white cloth, paper, etc.
Backlit: The dreamiest one. The sun is behind your subject, facing you. You'll get a soft cast across your photo and maybe even lens flare (glowing orbs). Tap on your subject to make sure you capture all the detail.
Power Move: If the sun is too harsh, seek shade for softer shadows or shoot indoors and sit your subject next to a window.
2. Artificial Lighting
The sun can be lazy, but a good photographer never sleeps! When the sun is napping, it's time for artificial light.
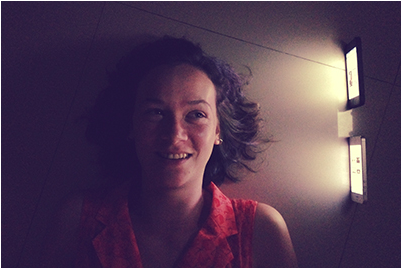
Some ideas: an external flash, a lamp, a flashlight, LEDs, another iPhone's screen, streetlamps, candles, disco balls, and the like.
Once you get your subject next to your light, follow the same principles as you would in natural lighting -- straight on, at an angle, or behind.
You can even use artificial light during the day if your subject's shadowy. Just make sure it's not too harsh, otherwise it'll look ... artificial.
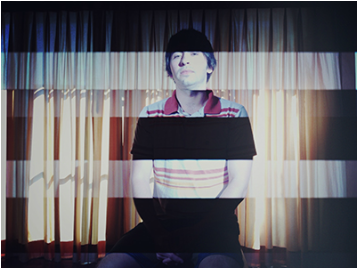
Power Move: Place your artificial light source in the photo itself for sweet dramatic lighting. Have a buddy hold it or even stand on it.
3. Tools
As an alternative to your iPhone's flash, try an off-camera flash, like the Pocket Spotlight. It'll give you strong, even lighting that'll light your subject even from far away.
You can also use apps as crafty work-arounds. Hipstamatic has faux flash filters to aptly brighten your photo, so it lookslike you used flash.
Snapseed's Selective Adjust tool lets you brighten specific parts of your photo, so you can mimic flash. Rad, right?
If your iPhone's built-in flash looks too harsh, diffuse it by holding tissue or cloth over it.
Power Move: A strong light looks awesome when combined with a black & white filter. It's what makes the photo look extra contrasty. Try it.
